If you are searching for the best homemade lemon meringue pie recipe made with fresh lemons it’s your lucky day! I am sharing Sweet Bytes’ most loved recipe. It’s the very same lemon meringue pie recipe that I have served for years to my family and customers in my bakery. Served at galas, weddings, birthdays, and family dinners alike, it’s tried and true.

This post contains affiliate links, I earn from purchases made from links in this post.
Isn’t it a beauty|? Let’s get you a big slice with beautifully toasted meringue sitting on top of that dreamy sweet/ tart lemon filling, nestled in flaky pie crust ASAP.
If you have some basic kitchen skills you will be surprised how easy it is to make. If you are a beginner, do a practice pie or two before you sign up to bake wedding pies, you’ll be a pro in no time!
(Really though, I always try a recipe a few times before sending it out into the world… No, it’s not just an excuse to eat pie… OK, it’s a win, win pie situation.)
What equipment and tools do I need to make lemon meringue pie?
- 9″ pie plate
- Medium non-reactive saucepan or pot
- Citrus juicer
- Microplane grater/ zester
- Measuring cups and spoons
- Mixing bowls
- Whisk
- Silicone spatula or wooden spoon
- Stand Mixer with a Whisk attachment or electric hand mixer
- Offset spatula (Optional but helps make the meringue look pretty and seal to the crust)
Why do I need “non-reactive cookware?”
It’s essential when you are cooking with acidic ingredients, like lemons, to use non-reactive cookware. If you don’t, the recipe will take on the metallic taste of the pan. It’s not good. I go so far as to stir with nonreactive utensils because sometimes even the spoon can ruin the taste.
Reactive pans cause a chemical reaction and are made from aluminum, cast iron, or copper. Non-reactive pans are made from stainless steel, glass, ceramic, or are enameled. The Kitchn has a nice, in-depth explanation of the whole thing here.
The pan that I use most often to make the recipe is a Wolfgang Puck, 2.5qt, stainless steel that I picked up on clearance at T.J. Maxx several years ago, but either of these is comparable:
What ingredients do I need to make a lemon meringue pie?
- 9″ Pie crust – pre-baked
- Sugar
- Flour
- Cornstarch
- Salt
- Fresh Lemons
- Butter
- Eggs
How to make a lemon meringue pie from scratch
In the following sections, I will walk you through step by step how to make this truly delicious pie. All of my best tips and details that won’t fit on the recipe card will be here. So if you jump to the recipe and get stuck, just swing back up here, and hopefully, I can help!
The first thing to do is prepare to bake, AKA mise en place! Find all of the ingredients and necessary equipment and make sure you have everything. Also, make sure you have at least 45 minutes to work and space in the refrigerator for the finished pie. (The pie will be stored uncovered, so a clean, odor-free refrigerator is a PLUS!)
Pre-bake your 9″ pie crust
Step one is to pre-bake your 9-inch pie crust. You will need to fully bake the pie crust to a golden brown, this is referred to as blind baking. If you’ve never done this before, you can check out my instructions: Baking Pie Crust.
Need an amazing pie crust recipe? Let me highly recommend the recipe that launched my home bakery business: Truly the Best Pie Crust Recipe. (Spoiler alert- it’s not my recipe.)
Yes… The size of your pie plate matters!
In this case, bigger isn’t always better. The size of the pie plate matters because the recipe will fill a 9-inch standard-sized pie plate.
Therefore, If you have a smaller or larger pie plate you can still make the pie, but you will have to make adjustments
The pans I use at home are simple aluminum or glass, like these:
However, a lot of home bakers have beautiful deep dish pie plates like this one:
If you have a pie plate that is 2 inches deep, you will need to double the filling part of the recipe for a nice and full pie.
Prepare your mixing bowl and mixer attachments
To make a successful meringue, you have to whip the egg whites to stiff peaks. That is nearly impossible with any oily residue in your bowl or on your beaters.
Since we are working with lemons, the easiest way to make sure your mixer is ready is to squeeze some lemon juice (about a tablespoon) into your mixing bowl, use a paper towel to soak up the lemon juice, and then wipe the inside of the bowl down and the beaters/ whisk attachment down with the lemon juice soaked paper towel.
(If you weren’t working with lemons, a little vinegar would do the same good job of degreasing the bowl.)
That’s it, now set it aside until you need it!
Zest lemons and squeeze fresh lemon juice
To make the best lemon meringue pie, you need fresh lemon juice and fresh lemon zest. Usually, this recipe takes 2-3 lemons, but a few times I’ve had a tough time getting enough zest and used 4 lemons.
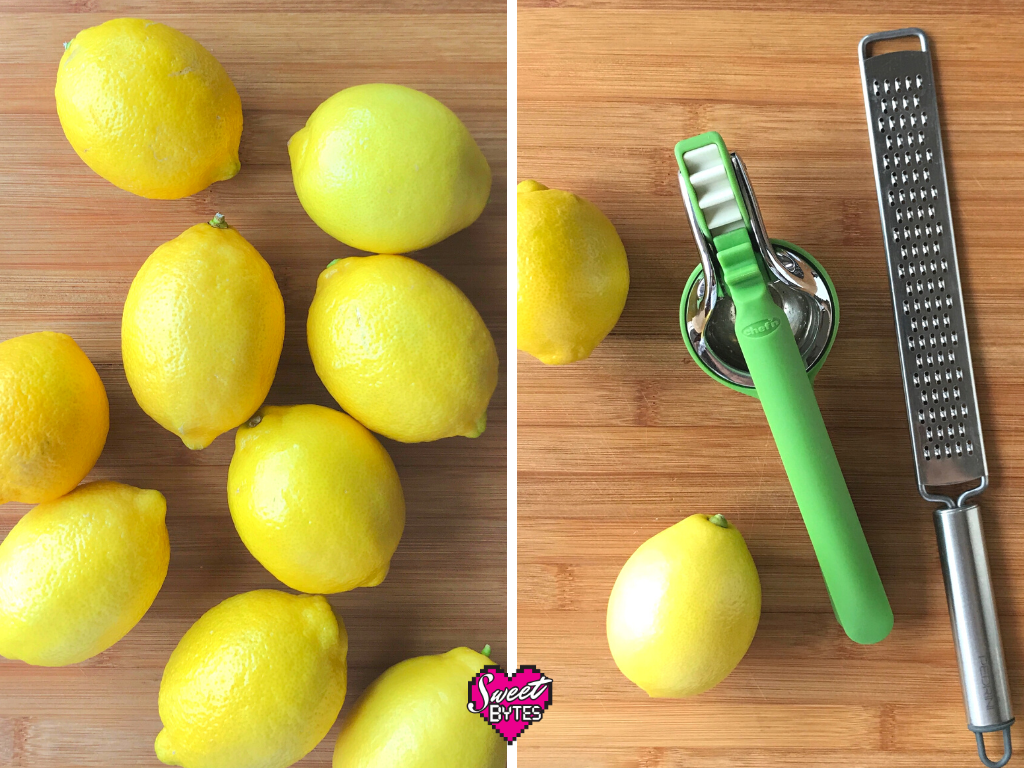
Before you squeeze the juice, get the zest! It’s really hard to zest a squeezed lemon. (Believe me, I’ve had to resort to desperate measures!)
I always use my micro-plane grater to get the zest. I’ve had it for years and it has saved me hours and hours in the prep time! Definitely worth the $10 I spent on it. Mine is very similar to this one:
If you don’t have a micro-plane grater or a cheese grater, here is a wonderful article over on Evolving Kitchen where she shows you 5 different ways to zest a lemon using a vegetable peeler or regular kitchen knife!
When it comes to juicing, rolling the lemons on the countertop helps get them ready to squeeze, at least that’s what my grandma always told me. Roll them back and forth while gently pushing down for a few seconds.
Cut each lemon in half and then squeeze them until you can squeeze no more! If you are going to make a lot of these pies, you might want to invest in a citrus juicer. I have an inexpensive, manual one that saved my hands.
My simple little citrus squeezer has been used to make hundreds of lemon desserts and key lime pies. It works like a charm!
After I juice the lemons, I pour the juice through a fine-mesh strainer to remove any seeds or pulp that got in the juice.
Prepare the lemon pie filling
Now it’s time to make the lemon pie filling!
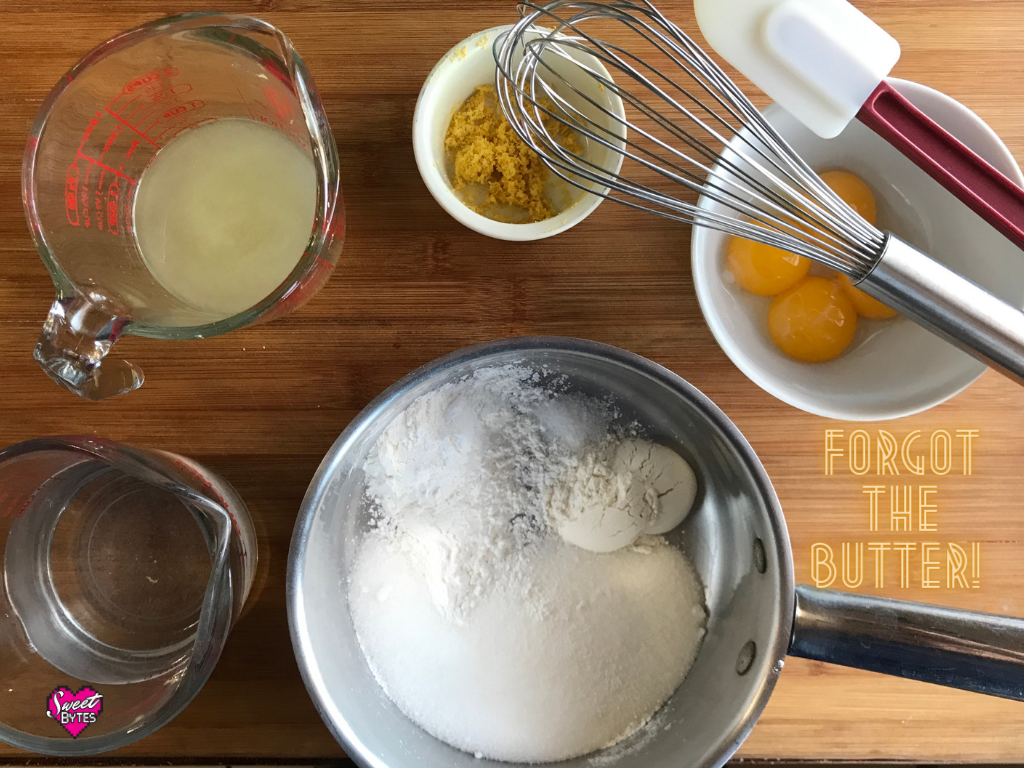
First, separate your eggs. I do one at a time into a ramekin or small bowl, it’s better to be safe than sorry. Place all of the egg whites in the degreased mixing bowl and place the yolks in a small mixing bowl.
The yolks need to be in a bowl that can take some heat because you will have to temper them by adding some hot lemon mixture when it’s time.
Next, add the sugar, flour, cornstarch, and salt to the non-reactive saucepan and whisk it all together.
Add the water, lemon juice, and lemon zest to the sugar mixture, stirring it all together. Get out all of the lumps now, be sure to scrape around the edges of the pan where those sneaky ingredients like to hide and clump.
Place the pan on medium heat, stirring constantly until the mixture boils. Continue boiling and stirring the lemon mixture for 1 minute, remove it from the heat. Add the butter and stir until the butter is melted.
The trickiest part of making the lemon meringue pie filling is tempering the eggs. However, if you go slow, you’ll see it’s not even that hard.
Very slowly, pour or drizzle about 1/2 a cup of the lemon mixture into the egg yolks while stirring constantly. You need the egg yolks to get hot, but if you do it too fast they will cook and become useless (which is why we are tempering them in the first place.)
After tempering the egg yolks, pour the whole egg mixture back into the lemon mixture and return to medium heat. Stir constantly while scraping the sides and bottom of the saucepan. Make sure none of the lemon filling is sticking to the bottom or scorching.
Once the mixture begins boiling, I continue boiling it for approximately 2 minutes. I say “approximately” because I go by sight after the 2-minute mark. The mixture will look like glossy, lemon pudding when it’s ready.
Get a little obsessive if you want it to “taste like happy”
At this point, I do get the tiniest bit obsessive. I strain the cooked filling through a fine-mesh sieve to remove any zest, pulp, or other less than silky bits. You don’t have to, but little steps like this really level up your pie game!
Strain it right into the pre-baked pie crust and set it aside while you move on to making that lovely meringue!
There are some pie makers that swear you have to put the meringue on immediately while the filling is piping hot, but I haven’t found that to make a difference. They say it will begin cooking the meringue as soon as you put it on the pie, but I am not sure that really helps.
Make the meringue
What will definitely help make this amazing pie complete is to make the meringue properly.
With the mixer on medium speed begin beating the eggs until they get foamy, then add the cream of tartar and beat to incorporate it.
After the cream of tartar, add 1 tablespoon of sugar and keep whipping on medium.
As soon as you are sure the sugar is mostly dissolved, turn the mixer up to medium-high and add another tablespoon of sugar. Continue mixing and add 1 tablespoon of sugar at a time until you have added all 6.
After all of the sugar is added, turn your mixer up to high speed and whip the meringue to stiff peaks. This is not a fast process. it could take 5 minutes or more to reach stiff peaks.
It’s OK to stop and scrape down the sides of the mixing bowl or check for peaks if you are unsure.
The meringue should stand straight out on the whisk attachment in a peak without drooping. Be careful not to overbeat the meringue or it will become clumpy and not hold form.
Toast the meringue
We are in the home stretch now! Time to put the meringue on the pie.

I scrape it all into the center of the pie in a big mound and use an offset spatula to spread the meringue to the edges of the pie. It is VERY important that you seal the meringue to the edge of the crust.
Make sure the seal is all the way around with no filling peeking out. After you are sure, use the offset spatula to make swirls and peaks for decoration. I like it to look rustic and like my grandma’s used to, but feel free to make it your own!
When you are satisfied with the way your meringue looks, place the pie in the preheated oven. I set my timer for 7 minutes, knowing that it won’t be done. Then, I watch it for the final 3 minutes until it looks perfect.
(I usually chicken out and stop toasting at 8-9 minutes.)

Allow the pie to come to room temperature then chill
Now that you’ve made the beautiful pie, allow it to sit out for 2 hours and cool to room temperature before you refrigerate it. Chill UNCOVERED for 4 hours or overnight.
In fact, I think letting the pie cool before refrigerating it has solved all of my lemon meringue pie problems. No weeping meringue, no weird sugar droplets form on top, and all is well.
Do not put this pie in an airtight container. I use a bakery box with no problem, but I usually just put the pie right in the fridge.
Serve the pie
This pie is best within 24 hours. It will last 2 days before a sticky syrup begins to form near the crust and it starts losing its integrity.
If you are selling these, definitely get them to the customer in 24 hours. If it’s for a friendly affair you are safe for making it up to 48 hours ahead of time.

Homemade Lemon Meringue Pie
The most amazing homemade lemon meringue pie recipe using fresh lemons and real lemon zest perfected with a beautiful meringue.
Ingredients
- 9 inch pre-baked/ blind baked pie crust
Lemon Pie Filling
- 1 cup white sugar
- 2 tablespoons all-purpose flour
- 3 tablespoons corn starch
- ¼ teaspoon salt
- 1 ¼ cups water
- ½ cup fresh lemon juice
- 1 tablespoon fresh lemon zest
- 2 tablespoons butter
- 4 large egg yolks, beaten
Meringue Pie Topping
- 4 large eggs whites
- ⅛ teaspoon cream of tartar
- 6 tablespoons white sugar
Instructions
Prepare to make the recipe
-
Pre-bake a 9" pie crust until golden brown
-
Use a microplane grater/ zester and zest approximately 2-3 lemons to make 1 tablespoon of lemon zest
-
Juice 2-3 lemons (more if needed) to get ½ cup of lemon juice
-
Separate 4 large eggs. Place whites in large mixing bowl to be used with the electric mixer, place yolks in a small mixing bowl
-
Preheat the oven to 350°F, place the rack in the center of the oven.
Make the lemon meringue pie filling
-
Whisk together sugar, flour, cornstarch, and salt in a medium non-reactive saucepan
-
Add water, lemon juice, and lemon zest to sugar mixture. Mix together.
-
Heat the lemon mixture until bubbling, stirring constantly with a non-reactive utensil. Add butter, boil and stir for 1 minute. Remove from heat.
-
Temper the egg yolks by VERY slowly pouring about ½ cup (more won't hurt) of the hot lemon mixture into the egg yolks while stirring continuously.
-
Pour the tempered egg yolk mixture into the saucepan with lemon filling. Heat over medium heat, stirring continuously until mixture reaches full boil. Boil for 2 minutes while stirring, remove from heat
-
Pour lemon mixture into the pre-baked pie crust, set aside. (I like to pour the mixture through a sieve to remove the lemon zest)
Make the meringue pie topping
-
In a large mixing bowl, add egg whites and cream of tartar, whip using medium-high speed until the cream of tartar is dissolved into the egg whites and the mixture is foamy
-
With the mixer still going, add 1 tablespoon of sugar to the foamy egg whites and continue whipping, turn the mixer up to high speed
-
Continue adding the sugar 1 tablespoon at a time giving each tablespoon time to be incorporated before adding the next
-
Whip until the meringue holds a stiff peak.
-
Heap the meringue onto the center of the pie filling. Use an offset spatula to spread the meringue to the edges of the pie and seal it to the crust. Seal the meringue all the way around the pie, leaving no filling showing.
-
Make swirls and peaks in the meringue with the spatula for decoration.
Toast the meringue
-
Place the pie in the oven for 7-10 minutes until toasted a light golden brown. Carefully watch the pie during the last few minutes as the meringue will quickly burn once if left too long.
Recipe Notes
Best within 24 hours. Pie may be stored, uncovered in the refrigerator for up to 3 days, and left out at room temperature for 2 hours.
Frequently asked questions about lemon meringue pie
Do you put lemon meringue pie in the refrigerator? Yes. The longest this pie can go unrefrigerated is 2 hours.
How do you store lemon meringue pie? Store it uncovered or loosely covered in the refrigerator
How do you keep the meringue from weeping? Make the meringue properly, whip it just long enough so that it holds a peak. Seal it to the edges of the pie crust before you toast it.
Was lemon meringue pie one of Elvis’s very favorite pies? That’s what I read, but I also read that he liked his mama’s best. From what I know about Elvis, he just liked to eat!
Can you freeze lemon meringue pie? It’s not generally recommended. If you want to try, freeze it uncovered until the meringue is frozen, then wrap it or place it in an airtight container. When you are ready to eat it, unwrap it and allow it to thaw completely in the refrigerator.
