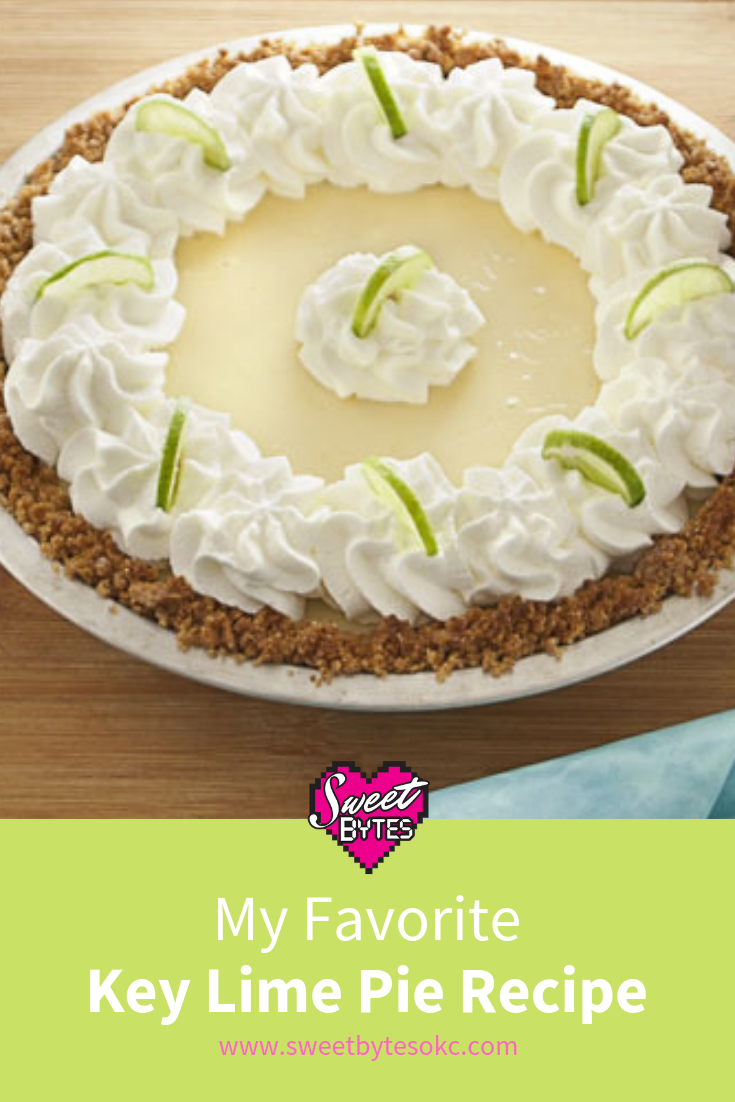
Are you a key lime pie lover? If not, I hope to make you a convert with this recipe! It’s just the right balance of sweet and tart and I’ve been told by more than one person that it’s the BEST they ever had.
I’m serious, this key lime pie recipe is AMAZING!
True story, one of my customers used to live in Florida and after he moved to Oklahoma he’d found nothing but disappointment served as key lime pie. Then, he tried mine and said it was THE BEST he’s EVER had!
That’s the best compliment a baker can get!
This post contains affiliate links, I earn from qualifying purchases.
This is a momentous occasion… really
This is the first full recipe from Sweet Bytes OKC bakery that I am sharing.
It’s such a big deal to me! I know Canadian online casino bloggers and online bakers share their recipes every day. Yet, food business owners, bakers, and chefs closely guard their secrets.
In fact, I have NEVER shared a recipe I sold. **GASP!** Not even with my MOM. That’s hardcore.
So here I am starting a new sharing everything adventure! I hope you’ll bake and make along with me. You’ll never miss a post if you sign up for Delicious News.
There are millions of easy key lime pie recipes out there on the internets
I mean really. Ha, I just did a Google and returned 15,400,000 results. Now there will be 15,400,001. Of course, mine is the BEST Key Lime Pie recipe.
It’s from scratch, using freshly squeezed key lime juice. Not too tart, but it does have a nice balance of zest and juice for that zing of key lime.
This recipe will definitely fill up a 9″ pie plate. A lot of other recipes yield a thin layer of key lime custard filling and that makes me sad. It’s true, I need a thick pie.
It’s also incredibly easy.
Really, whether you are brand new pie maker or you are an OG in the pie game, you will be able to handle this recipe. This key lime pie will make a superstar baker out of anyone!
What are the ingredients in a key lime pie?
- Graham cracker crust
- Egg yolks
- Key lime zest
- Sweetened condensed milk
- Key lime juice
See? Very simple. You can even go buy key lime juice and a graham cracker crust if you are in a hurry. Seriously though, It pays off to make your own.
Just in case you are in a hurry, this is my favorite brand of store-bought Key Lime Juice and my favorite store bought Graham Cracker Pie Crust
.
What tools and equipment are needed to bake a key lime pie from scratch?
- An oven that will bake for 25 minutes at 350°F
- A Pie Plate
- Microplane Zester/Grater
- Some sort of juicer (or you can hand squeeze)
- A sharp knife for cutting key limes in half
- Measuring cups
- Measuring spoons
- One small Mesh Strainer
(unless you don’t mind the pulp)
- A medium sized non-reactive bowl for mixing the filling (plastic, stainless steel, or glass)
- Stainless steel or silicon whisk
- A spatula is nice for scraping out the bowl and stirring the batter
If you are not familiar with zesting, watch this great little video from Your Produce Guy:
Why non-reactive utensils are important:
When you are working with citrus or acidic ingredients, like key lime juice, it’s very important to use stainless steel, glass, silicone, or plastic utensils and equipment. In other words, nonreactive cookware and utensils.
The reason is that the acid will cause the flavor of your food to pick up the metallic taste or other bad flavors from the reactive cookware. The acid in the food can also damage your utensils and cookware. They really don’t get along at all.
How to make key lime pie
Like most recipes, this one will work best if you read the recipe first, clean your work area, and lay out all of your ingredients and supplies before you start cracking eggs and mixing things. AKA mise en place.
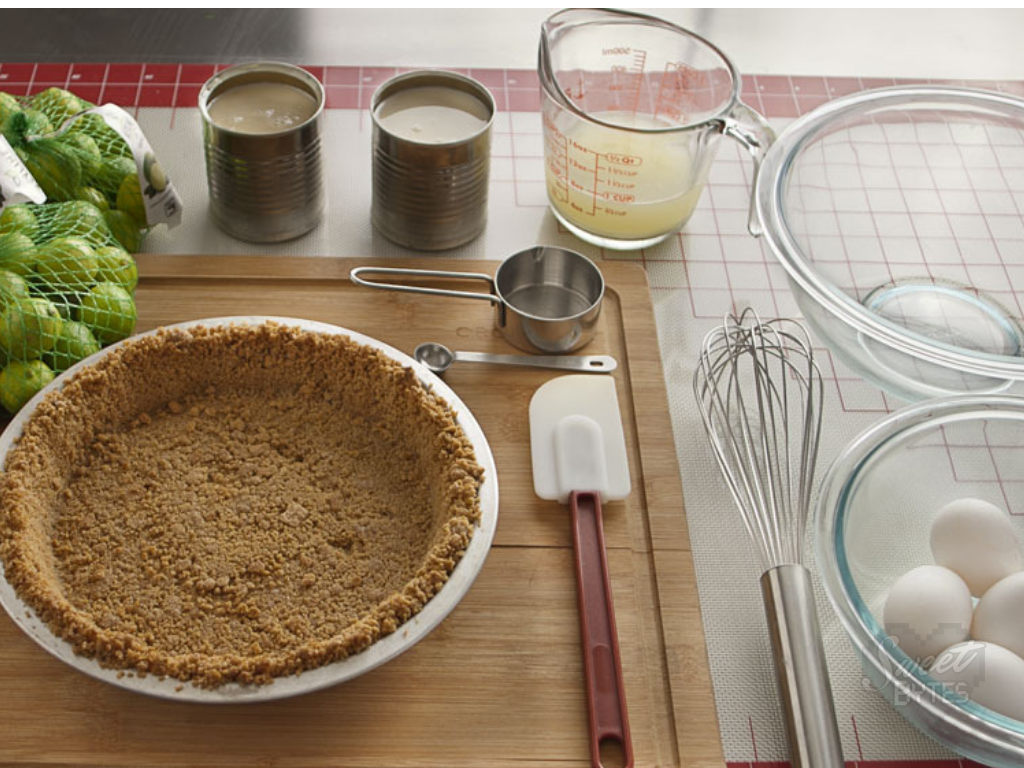
Get your favorite graham cracker crust ready
I’d be delighted if you used my recipe, Graham Cracker Crust for Pie! If you are going to use a store-bought crust, go ahead and bake it so it will be ready.
This can be done up to a week before time to bake the pie. Just store the crust at room temp with a cover over it.
Get your key lime zest and key lime juice prepared
I always squeeze my own key lime juice for the best flavor. By the way, don’t forget to set aside 4-5 of the prettiest key limes from the bag to save for garnishing the pie (and for your Instagram photos of your amazing pie! #tasteslikehappy @sweetbytesokc )
Zest the key limes first
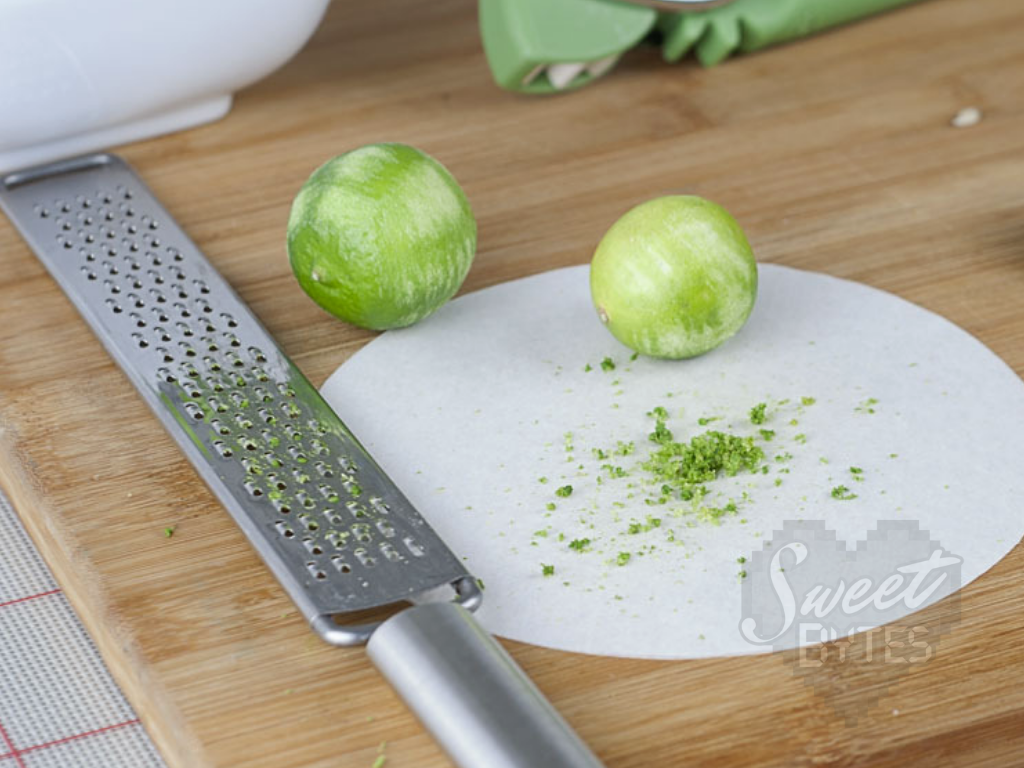
Zest your key limes before you make key lime juice. They are much easier to zest when they are whole and not all juicy.
When you zest the key limes, you need to be extremely careful not to get any of the pith (the white fleshy part of the peel) into your zest. Key lime pith is very bitter, I think it tastes like bile. Not very appetizing.
Lightly rub your key lime across the microplane to scrape the green part off of the key lime rind. You only need a 1/4 of a teaspoon for this recipe, so about 2-3 key limes should do.
Juice your key limes
If you’re an old pro at citrus juicing, you can handle the juice however you’d like. If you’d like to see my approach, here’s my step-by-step guide to How to Make Key Lime Juice.
If you are cheating with the bottled juice, you won’t have any zest or lime garnish, but your key lime pie will still be good. The biggest difference will be a little less tart flavor and you won’t have the little flecks of light green speckled throughout the pie.
Separate your eggs
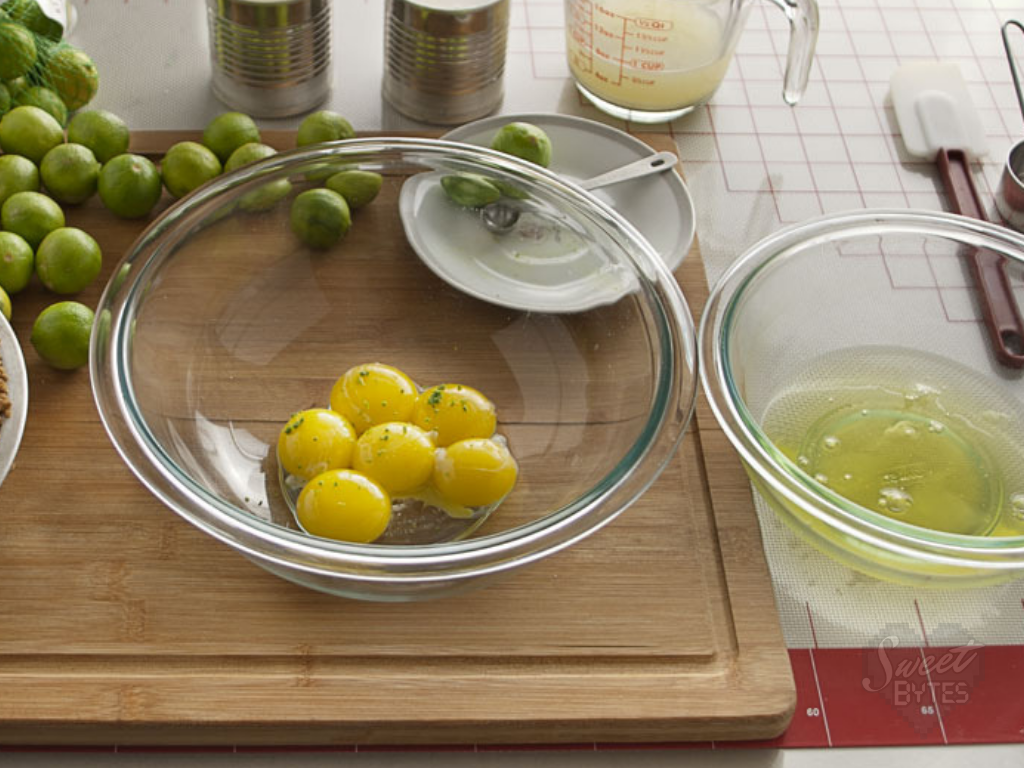
For a key lime pie, you only need the egg yolks. This key lime pie only works because of the egg yolks that form a custard when mixed with the other ingredients and baked.
Please don’t ask me if you can leave out the egg yolks. You can, but you’ll have bubbling hot lime milk in a pie shell, not key lime pie.
Separate your eggs, placing the yolks into the non-reactive mixing bowl you are going to use to make the key lime pie filling.
Here’s a short little video with 4 easy ways to separate your eggs if you’ve never done it! It’s not hard.
You’ll have enough egg whites left over to make some yummy Swiss meringue buttercream, a couple of egg white omelets, or just freeze them for later use! Don’t toss them out, they come in handy.
Whisk the egg yolks with the key lime zest
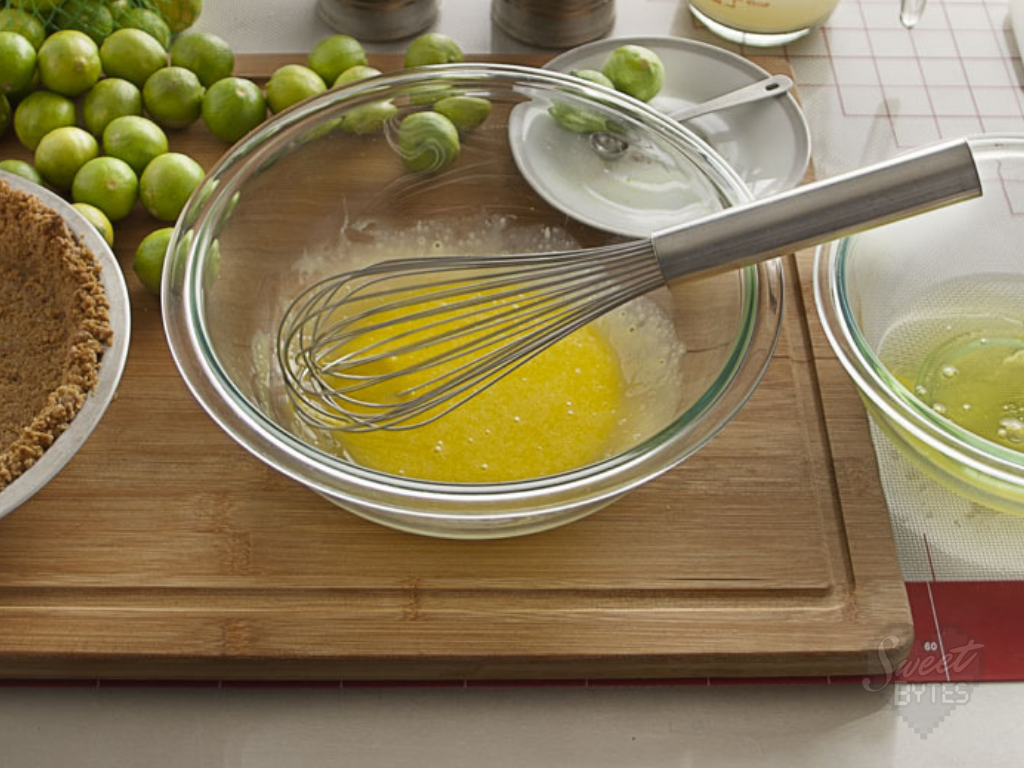
After separating the eggs into the bowl, you’ll dump the lime zest into the eggs and whisk away until the eggs yolks are lemony yellow and the lime zest has been evenly distributed.
If any of the lime zest is clumping, smash it against the side of the bowl with the whisk and then whisk it some more. This takes 2-3 minutes. It’s good for the arm muscles.
I don’t use a mixer for it. Too many dishes for too little work.
If you have a physical condition where you can’t whisk by hand for 2-3 minutes, use your mixer on a lower setting. We aren’t trying to whip it up too much.
Add the sweetened condensed milk and lime juice
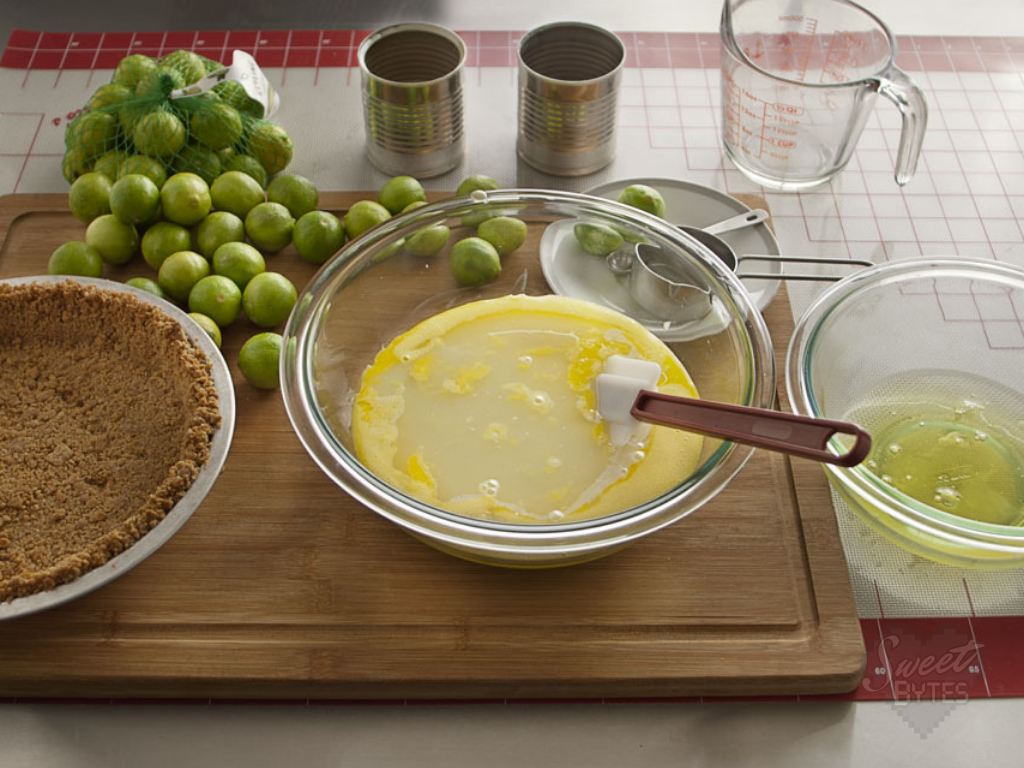
At this point, you’ll pour in one whole can of the sweetened condensed milk. Next, measure out 2/3 cup of the other can of sweetened condensed milk and pour it into the egg yolks too.
Measuring sweetened condensed milk is a sticky mess, I know, sorry. It pays off in a deep key lime pie though!
Save your other half can in the refrigerator for another key lime pie or to pour some in your coffee! My husband dips crackers in it… but I don’t know if that’s normal. Do you know anyone who does that??
Stir all of the key lime pie ingredients together
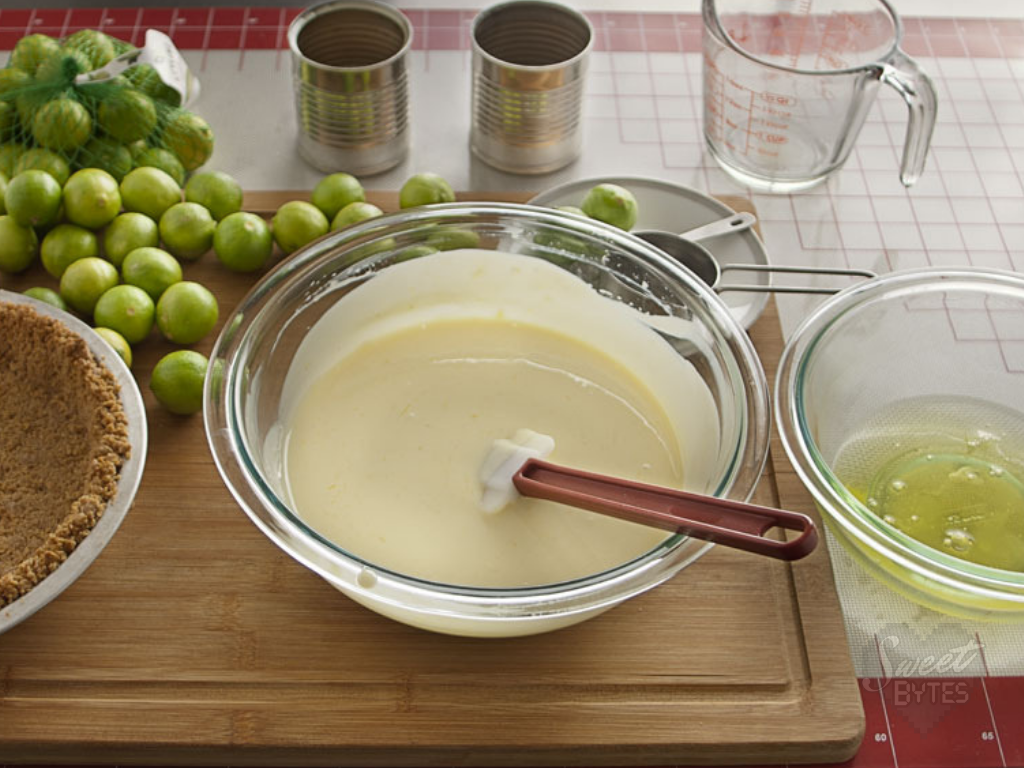
Now that you have everything in the mixing bowl, all you have to do is slowly stir it all together. You can use the whisk to get a good start since the thicker sweetened condensed milk resists the key lime juice.
After it starts to be mixed fairly well, switch to your spatula so you can scrape the sides of the bowl every now and then. You know, make sure none of the good stuff is hiding at the bottom of the bowl.
After 3-4 minutes, it should start to look like one uniform filling.
Keep stirring until you can’t see any separated ingredients. It should be a very pale, lemony greenish… pale chartreuse… Is that a thing?
I just Googled it. It’s a thing. Blam! See, I DO use my art degree.
Pour the key lime pie filling into your pre-baked graham cracker crust and bake it
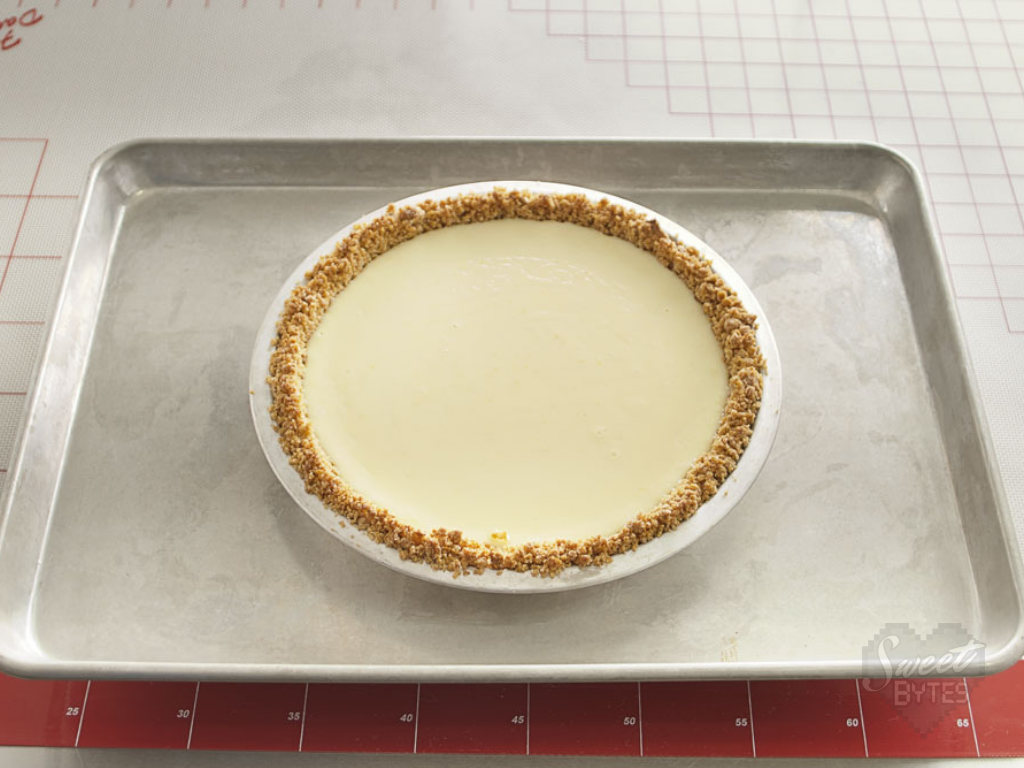
I place my graham cracker crust on a baking sheet before I pour the filling into it. I do this because carrying around a pie pan full of sloshy custard is too risky after all that work we just did to make this pie filling.
If you are using a 9″ deep pie plate, this should be just enough key lime pie filling to fill it up almost to the rim. Do not overfill your pie plate, just go almost up to the top, but leave a little crust showing.
Bake this pie in the center of the oven on 350°F for 20-25 minutes. I set my timer for 20 and check to see if the pie is done. It never is, so I reset the timer for 3 more minutes, then 2 more minutes.
I hover around the oven during the last few minutes of a bake.
It’s done when it’s done, not when the timer goes off.
That’s one of the hardest rules of baking. The timer doesn’t know anything. You have to learn to follow your nose and your eyes and sometimes the sounds along with the timer.
How to tell when a key lime pie is done
When the pie is done it will only slightly jiggle when you bump the pan. The edges of the pie won’t move at all, but the center will give a very slight movement (the jiggle) when you GENTLY bump the side of the pie plate.
If you bump the pie pan and the whole pie ripples, it is not done. It if wobbles, it’s still not done. A very tiny jiggle, only in the center.
Have you ever eaten Jell-O? It will be like that. Don’t touch the top of the pie though.
If you cook it too long, the pie will have little crinkles all around the edges where it overcooked. It won’t taste terrible, and you can hide it with a garnish, but the texture won’t be as creamy. If you cook it way too long it will even get a little crumbly.
After you try it the first time, you may decide it was too creamy or soft in the center and you can bump up the cooking time next time by 2 more minutes. Everyone’s oven is different.
Cool and chill before serving
If you cut the pie when it’s warm, it will probably lose its shape and be like warm pudding. Not pretty.
Take the pie out of the oven when it’s done and allow it to cool to room temperature before refrigerating it.
After about an hour at room temp, the pie should be ready to go in the refrigerator. It’s best if you can cover the pie to keep it safe from harm or odors.
Try to cover the key lime pie without touching the top. It’s not like a pudding pie where plastic wrap can sit directly on the surface, it won’t get a “skin.” A Pie Carrier or a Baker’s Sheet with Lid
will do.
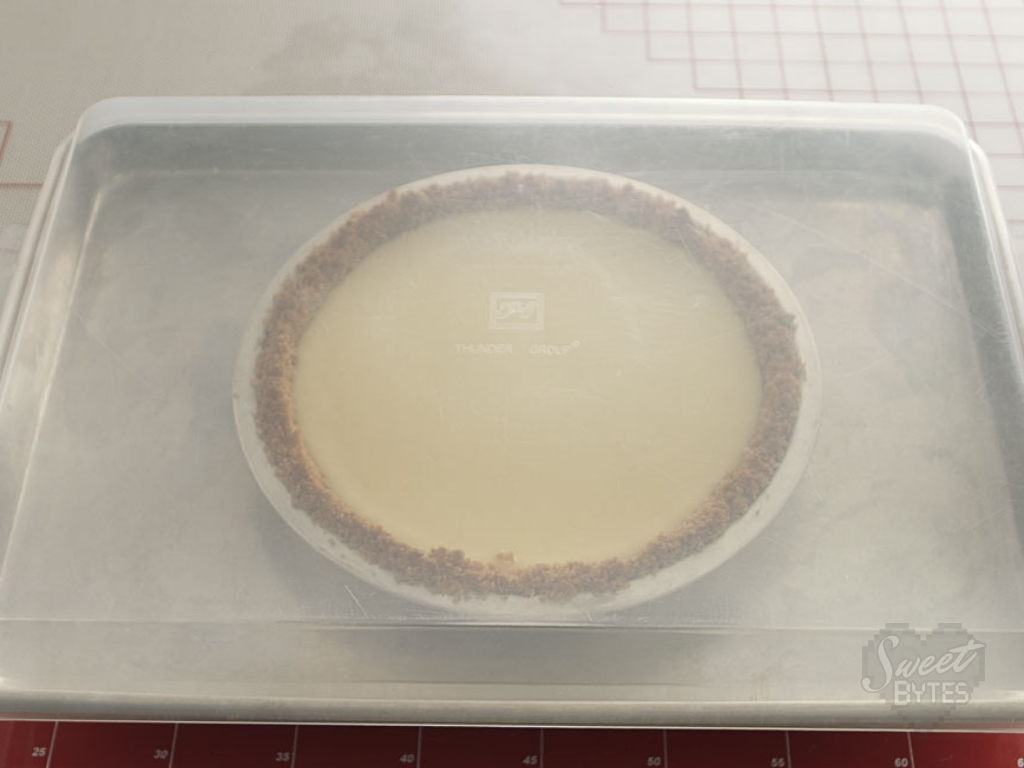
The pie will need to be refrigerated for at least 4 hours and can even wait as long as 3 days to be served. I think the flavor of key lime pie is best on the 2nd day.
Garnish and serve or just dig in

Now that you have baked a wonderful key lime pie, you can slice it and serve it as it, or you can garnish it.
Everyone has their own personal preference for whipped cream or no whip cream, but I love it.
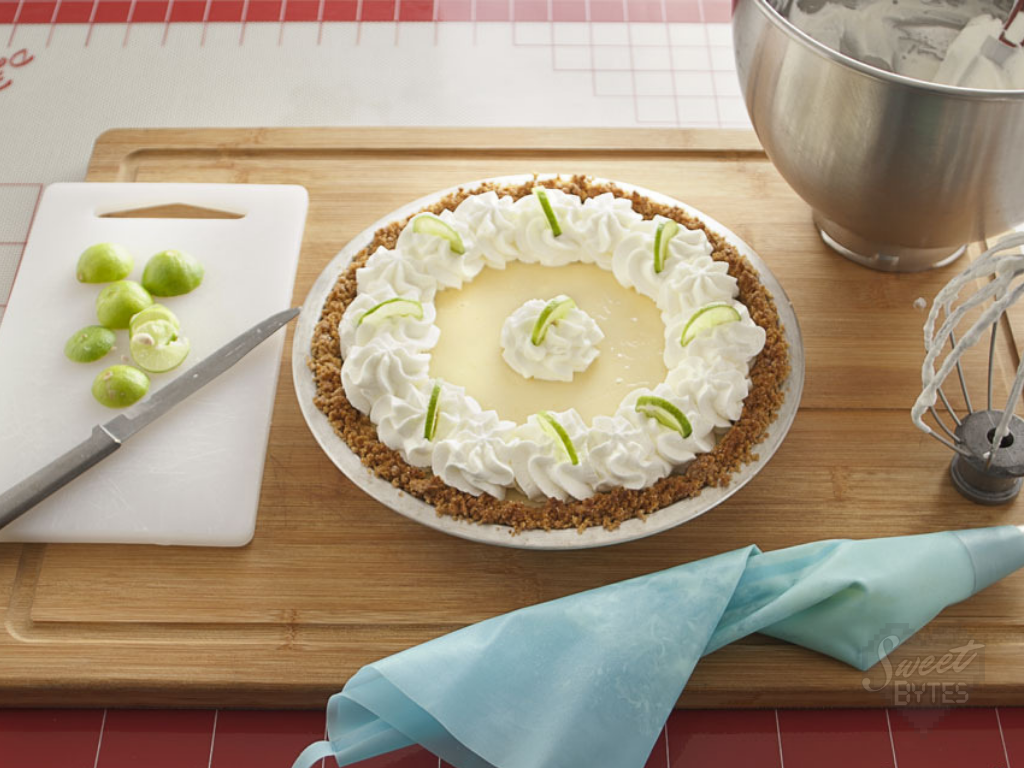
I don’t bury the key lime pie in it but I love piping some whipped cream rosettes or ruffled dollops with my pastry tubes and piping bags. For the pie in the picture, I used my Ateco Decorating Tube #846. These XL decorating tubes are just perfect for pies! I really like these reusable Silicone Pastry Bags
too!
Here’s an easy recipe for whipped cream that won’t go flat on you!
Best Key Lime Pie Recipe
This is the recipe for the best key lime pie from Sweet Bytes OKC! You will be amazed at how easy it is to make your own key lime pie from scratch.
Ingredients
Equipment Needed
- 9″ Pie pan
- 1 medium mixing bowl (for the crust)
- 1 Baking sheet
- 1 medium non-reactive mixing bowl (glass, plastic, stainless steel)
- Measuring cups
- Measuring spoons
- 1 Non-reactive whisk (silicone or stainless steel)
- 1 Spatula
Graham Cracker Crust for Pie (or use a store bought crust)
- 1 1/2 cup Graham crackers (127.5 grams)
- 1/4 cup Sugar (50 grams)
- 1/3 cup Butter, melted (76 grams)
Key Lime Pie Filling
- 6 Egg yolks (108 grams)
- 1/4 teaspoon Key lime zest (.50 gram)
- 1 can Sweetened condensed milk (410 mL)
- 2/3 cup Sweetened condensed milk (160 mL)
- 3/4 cup Freshly squeezed key lime juice (180 mL)
Instructions
Graham Cracker Crust for Pie (skip if using store-bought)
-
Pre-heat oven to 375°F
-
Mix graham cracker crumbs and sugar together in a medium sized mixing bowl.
-
Pour melted butter over graham cracker mixture. Stir and mash together with a fork until all of the butter is incorporated and the crumbs are moist, like wet sand. If there are any big clumps, smash them out.
-
Pour moistened crumb mixture into center of the pie plate. Use the flat-bottomed device, such as the bottom of a measuring cup or shot glass, to compact the crumbs and form them to the pie plate.
-
Bake at 375°F for 8-10 minutes until crust is lightly browned around the edges. Allow the crust to cool while preparing the filling
Key Lime Pie Filling
-
Preheat the oven to 350°F with rack in the center position.
-
Place egg yolks in your non-reactive mixing bowl along with the key lime zest.
-
Whisk the egg yolks and key lime zest until the egg yolks are lightened and lemony in appearance and the key lime zest is evenly distributed throughout the yolks. The zest should look like tiny flecks of light green throughout the mixture.
-
Pour one whole can PLUS 2/3 cup of sweetened condensed milk into the egg yolk mixture.
-
Pour key lime juice into the egg yolk and sweetened condensed milk and stir until all of the ingredients are well mixed and there are no streaks. The key lime pie filling will be uniform in consistency and color.
-
Set the graham cracker crust in center of a baking sheet. Pour the key lime pie filling into the crust. The filling should be lower than the edge of the crust, do not overfill.
Baking and Serving
-
Carefully place the baking sheet with the unbaked pie into the oven and bake for 20-25 minutes. The pie is done when it barely jiggles if you gently bump the side of the pie plate.
-
Remove the key lime pie from the oven and allow to cool for approximately 1 hour at room temperature.
-
Cover the pie without touching the top and refrigerate for at least 4 hours or up to 3 days before serving.
-
Garnish and serve. A homemade whipped cream is highly recommended!
-
Store uneaten pie in refrigerator up to 7 days or freezer up to 3 months.
Recipe Notes
This pie is not meant to be served warm. It will lose its shape if you do not let it chill in the refrigerator.
You may end up with too much key lime pie filling for your pie plate. You can bake it in a ramekin or small oven-safe dish alongside the pie. It will be done in about 1/2 the time as the pie.
Frequently asked questions about key lime pie
- Does key lime pie have to be refrigerated? Yes, because of the egg yolks and milk. It can be out up to 4 hours, and then it needs to go back to the refrigerator.
- What does key lime pie taste like? It’s sweet with a very tart taste that goes with it. Key limes are like regular limes x10 tartness.
- How to freeze key lime pie? Place it in the freezer uncovered for about 1 hour. That should firm it up enough to wrap in plastic wrap or place in an airtight container. Keeping it airtight is the secret to keeping it tasty.
- Can I eat key lime pie if I am pregnant? Yes, it is cooked long enough and hot enough to kill any risk of foodborne illness from the eggs. You might get heartburn though, key limes are acidic.
- Is key lime pie a custard? Yes, yes it is. It is made with egg yolks and milk cooked until set.
- Can I substitute regular limes for key limes? Not if you want to make a key lime pie. The recipe will work, but it won’t taste the same. If you use lemons it will be a lemon icebox pie 🙂 (bonus tip for reading ALL THIS <3 )
Questions and Comments
There you have it! My first shared Sweet Bytes bakery recipe! I hope you will give it a try or save it for later.
If you have any questions, please leave a comment below or send me an email.
Stay in touch by joining the Delicious News email list!
